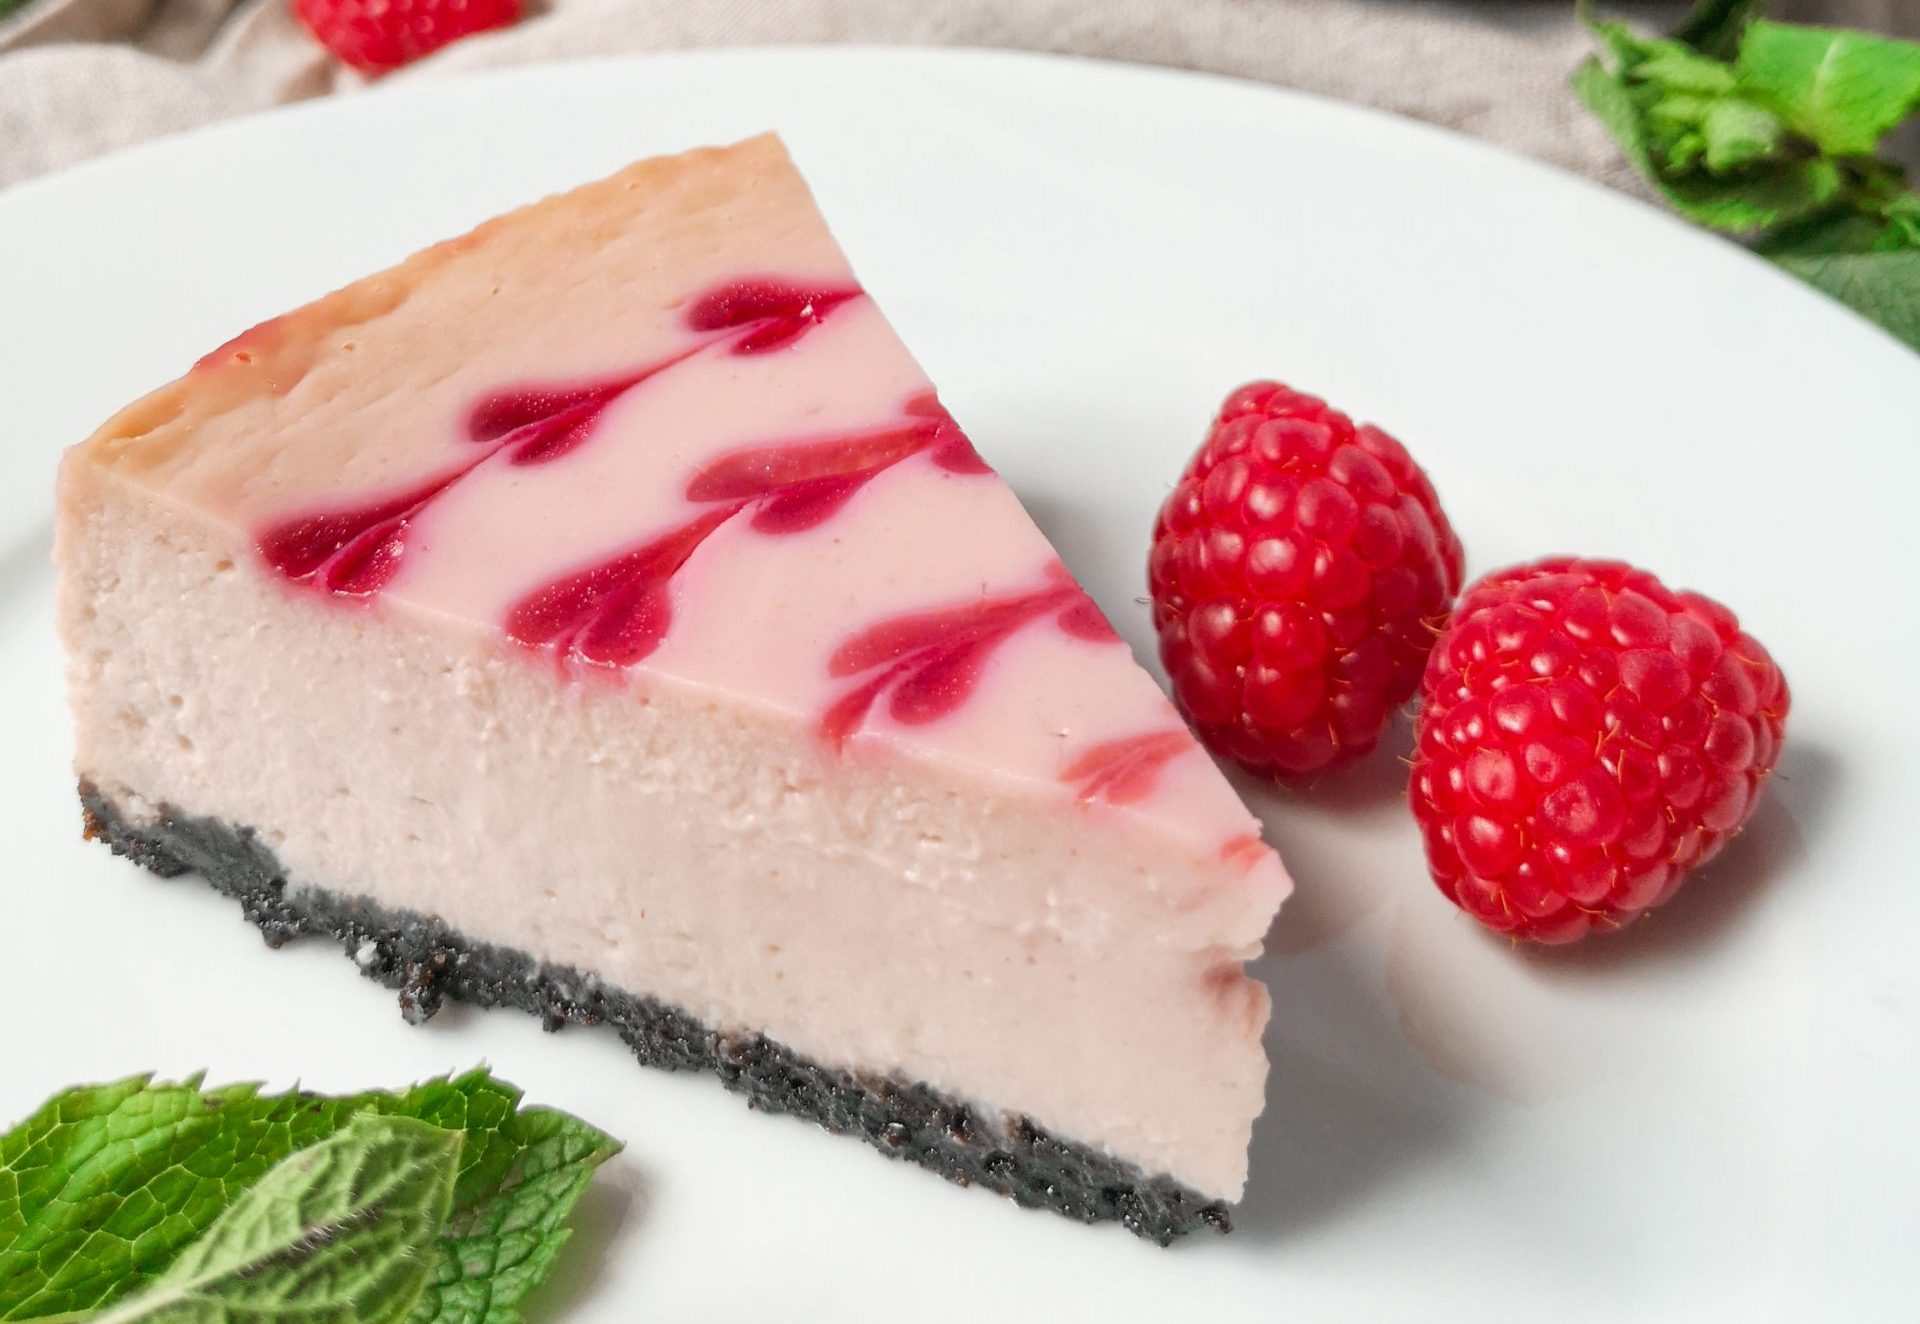
We made a pink cheesecake recently to support the Hong Kong Hereditary Breast Cancer Family Registry. To help awareness for the registry, they are hosting this event called “Pink Desserts Home Challenge 2020” to invite the public to make pink desserts or drinks. We thought about a couple of different pink desserts to make, but we end up choosing this Raspberry White Chocolate Cheesecake. It is adapted from one of our all-time favorite cheesecake recipes. It used to be one of the most popular cakes among my ex-colleagues, and I’ve been sharing this recipe so many times. I definitely would say it’s one of the best cheesecakes we ever had! Look at how romantic it looks, and it will also be perfect for Valentine’s Day or any romantic occasion too!
What makes this a bit different than the old times is I use some raspberry sauce to create the pink cheesecake texture. But because of the raspberry sauce, it also makes the texture of this cheesecake more soft and cream than usual. The white chocolate is definitely enhancing the flavors of the whole cheesecake. And having this cheesecake on the oreo biscuit base is the best! I wish I had made it a bit thicker, but I’m also happy the way it is. Despite already reduced some sugar, I still find the cake on the sweeter side, so if you don’t like such a sweet cake, I recommend you to reduce the sugar by another 10-15g from the recipe.
This pink cheesecake doesn’t only looks great, but it also tastes amazing! We have made a short making-of video on Instagram, hope it will make it easier to understand how to make it. If you make it, please take a picture and share it with us too!
Pink Raspberry White Chocolate Cheesecake
Ingredients
Oreo base
- 10 Oreo (Without the vanilla cream in the middle)
- 25 g Butter
Cheesecake
- 335 g Cream cheese
- 60 g Granulated sugar
- 1 Egg
- 1 Egg white
- Pinch of Vanilla extract
- 150 g White chocolate
- 60 mL Whipping cream
Raspberry sauce
- 160 g Raspberries fresh or frozen
- 1 tbsp Granulated sugar
- 5 mL Lemon juice
- 7 g Cornstarch
- 80 mL Water
Instructions
Cheesecake Base
- Melt the butter (in microwave/water-bath).
- Crash the biscuit to supersuper fine. Mixed together with the butter.
- Put it to the cake form and press to make the base of the cheesecake. Put in the fridge until you are ready.
Raspberry Sauce
- Mix Corn starch and sugar well in a small pot.
- Add water, lemon juice and berries.
- Cook in medium fire, stir occasionally until it gets thick. If it bubbles too much, turn down the fire.
- Pass the mix through a strainer to remove any seeds/skin. Leave it aside to cool down a bit.
Chocolate mix
- Melt the white chocolate with the heavy cream until it is all mixed (water-bath or in microwave 30s - mix - 30s - mix - until everything is melted).
Cheesecake
- Melt the cream cheese (water-bath) in a large bowl (you will mix everything in this bowl at the end).
- Add sugar and mix just enough to get them combined (don’t overmix – it will create air pocket when you bake).
- Add the eggs and gently mix it to the cream cheese.
- Add vanilla extract and gently mix. Add the chocolate mix and mix until just combined.
- Gradually add some raspberry sauce to the mix, and mix gently. I add 2 table spoons of raspberry sauce each time and added around 8 table spoons in total.
- Take out the base from the fridge. Pour the cream cheese mix to cake form.
- [Optional] Decorate with heart shape on top - use a syringe/dropper to drop a round drop of raspberry sauce on the cheesecake, clockwise from the outside to the center. Use a toothpick, carefully draw through the red dots from the outside to the middle of the cake mix.Alternatively, you can put some raspberry sauce on top, make some swirls with toothpick/knife - and it will look pretty.
- Bake at 170°Celcius for 40 mins. When it's done, leave it in the oven for another 5-10 mins with the oven door open, so it can cool down slowly. When it's cool down completely, put it in the fridge for at least a few hours before served.